
Exploring MusicKit and Apple Music API
Unlock the full power of MusicKit & Apple Music APIs in your apps with the best guide! Use code musickit-blog for a limited-time 35% discount!
Having pretty combinations of custom fonts in your app may help your app stand out from the crowded App Store. Adding custom fonts to your project requires you to follow a standing procedure.
Missing any one of them leaves you stranded for solutions. This post is a step-by-step approach to adding custom fonts easily in your app!
Downloading Custom Fonts
You can find many places to download custom fonts, one of which is Google Fonts. For this post, let’s download the Montserrat.
When you download the family, it provides a variable font as Montserrat-VariableFont_wght and static fonts like Montserrat-Bold, Montserrat-Regular, Montserrat-Light, etc.
Adding Custom Fonts to your Xcode Project
Instead of manually adding every one of the static fonts to the project, you’ll rename Montserrat-VariableFont_wght to Montserrat and paste the variable font into your project.
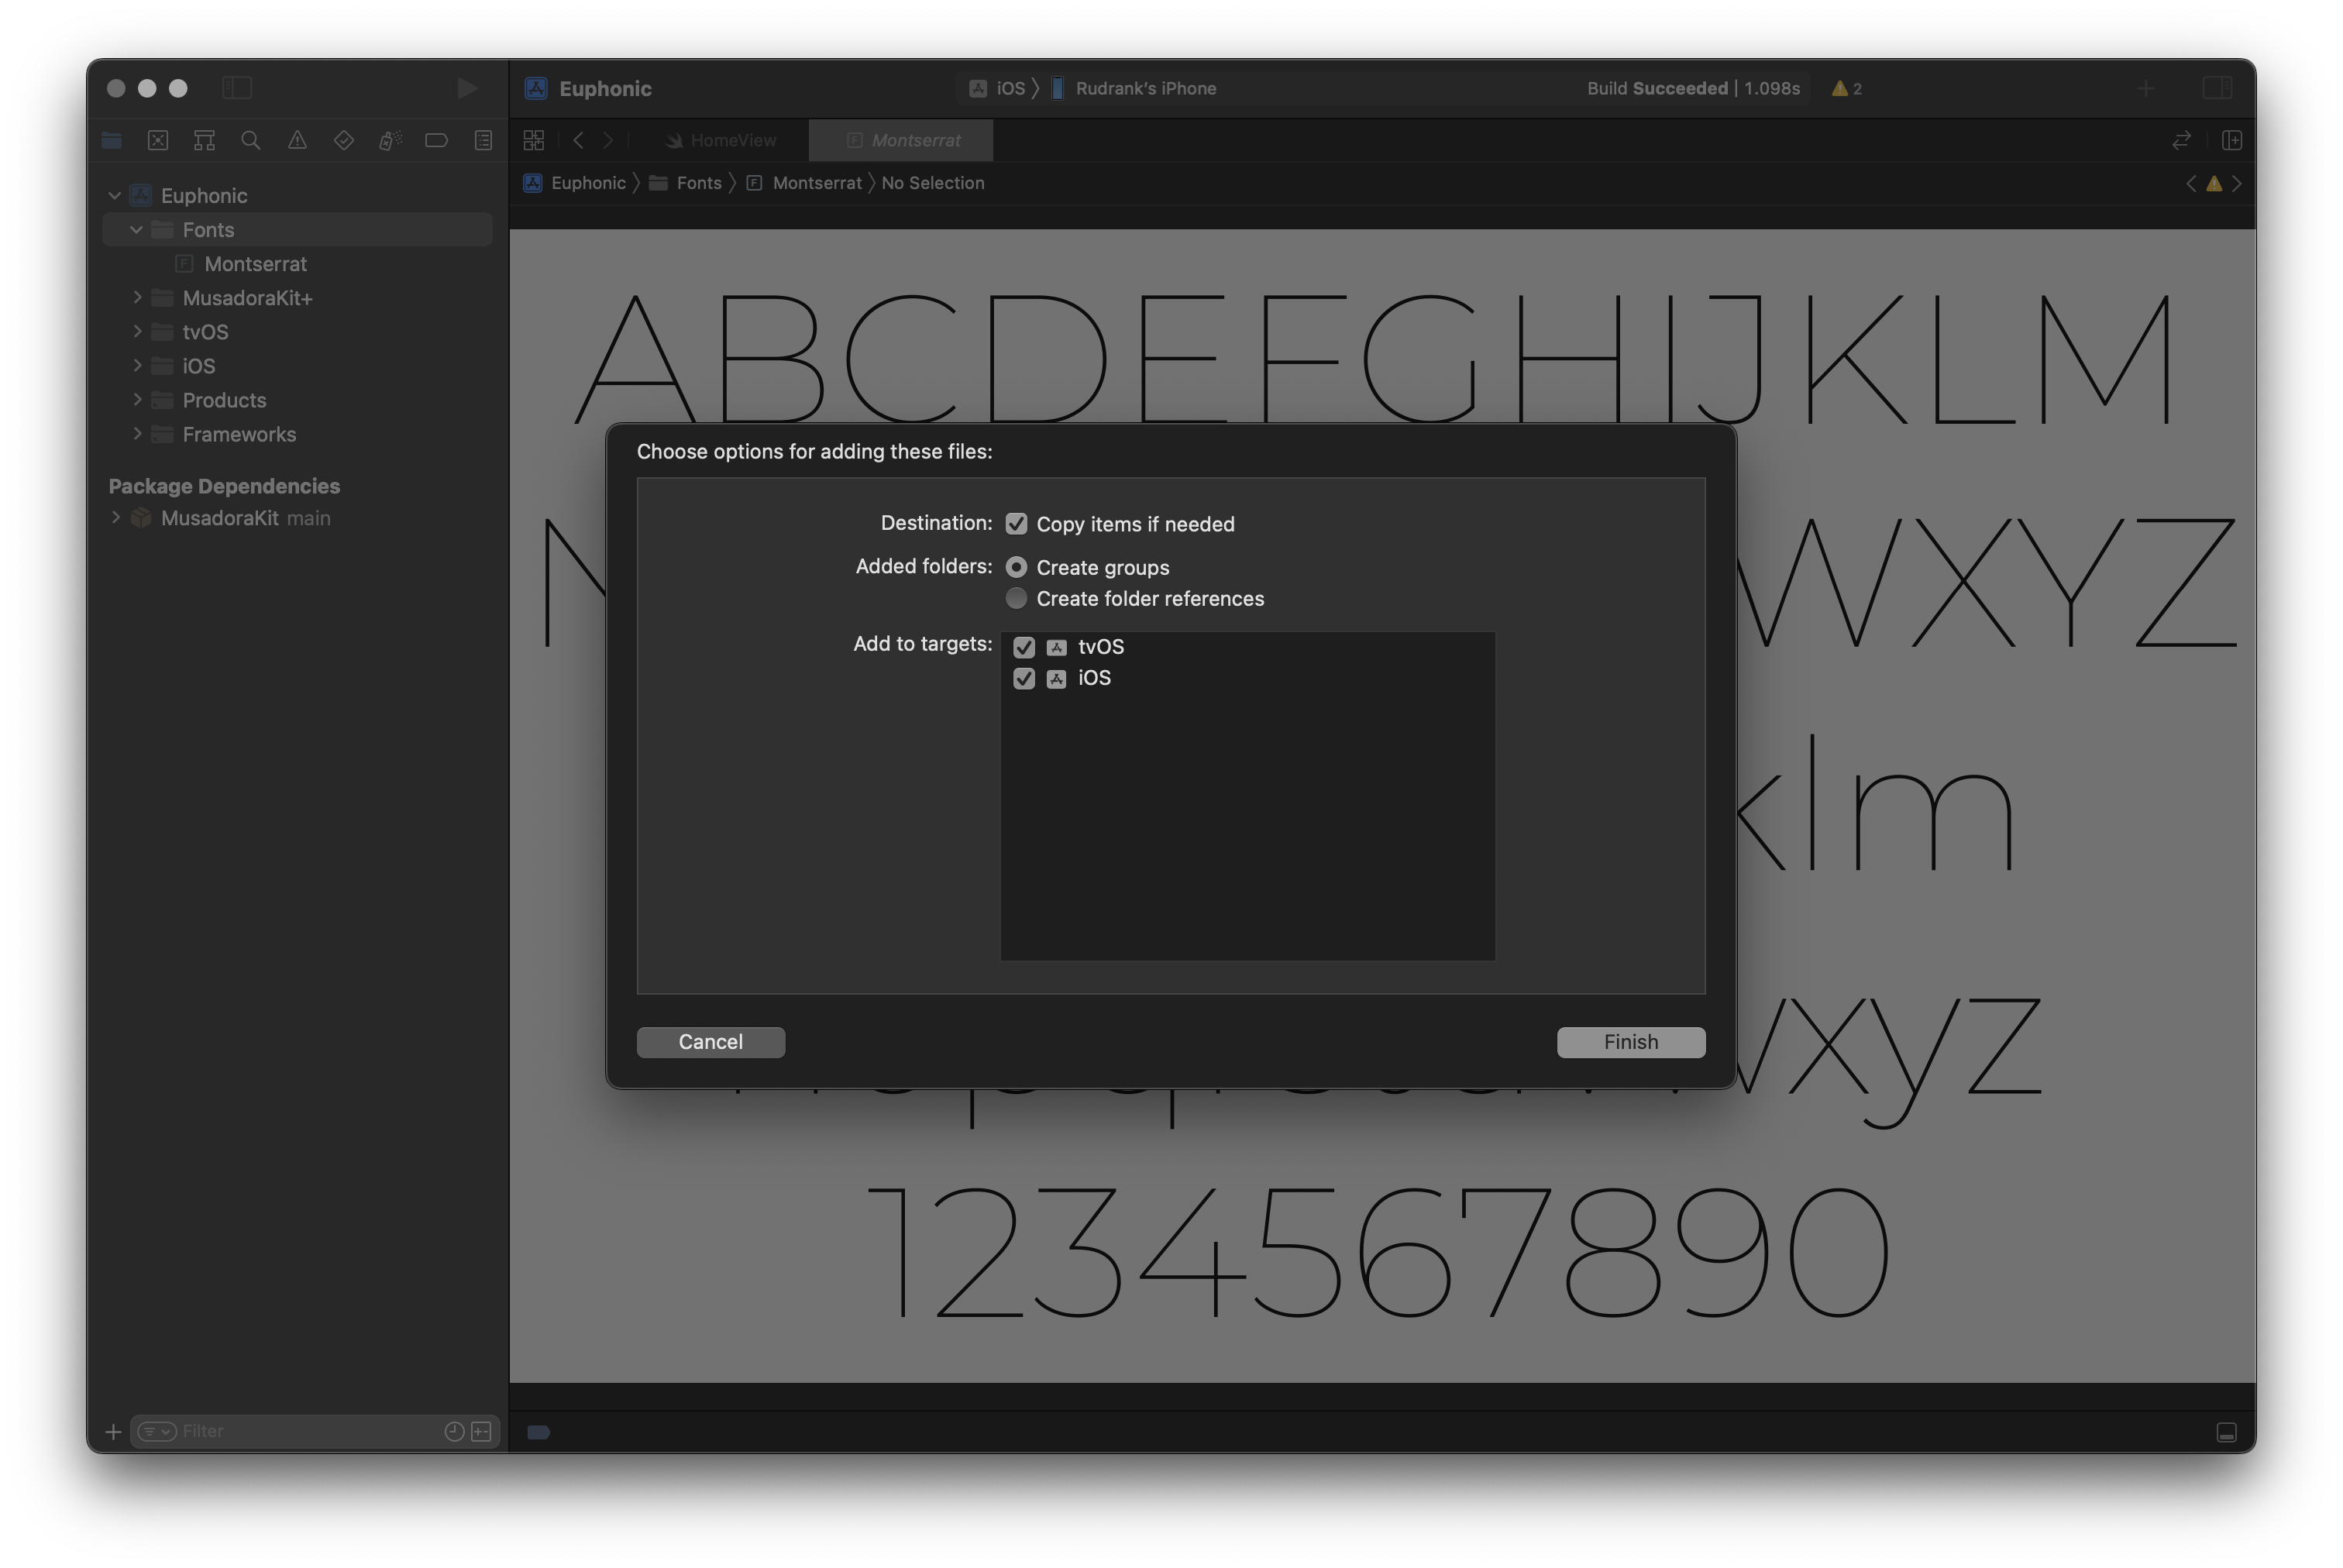
Make sure to follow the next two parts carefully:
- Checkmark Copy items if needed
- Add it to the required targets
Updating Info.plist
Next, add a new item, Fonts provided by application, to every Info.plist of the targets where you intend to use the custom fonts. This item is an array of items containing the name of the custom font with particular file formats like ttf or otf.
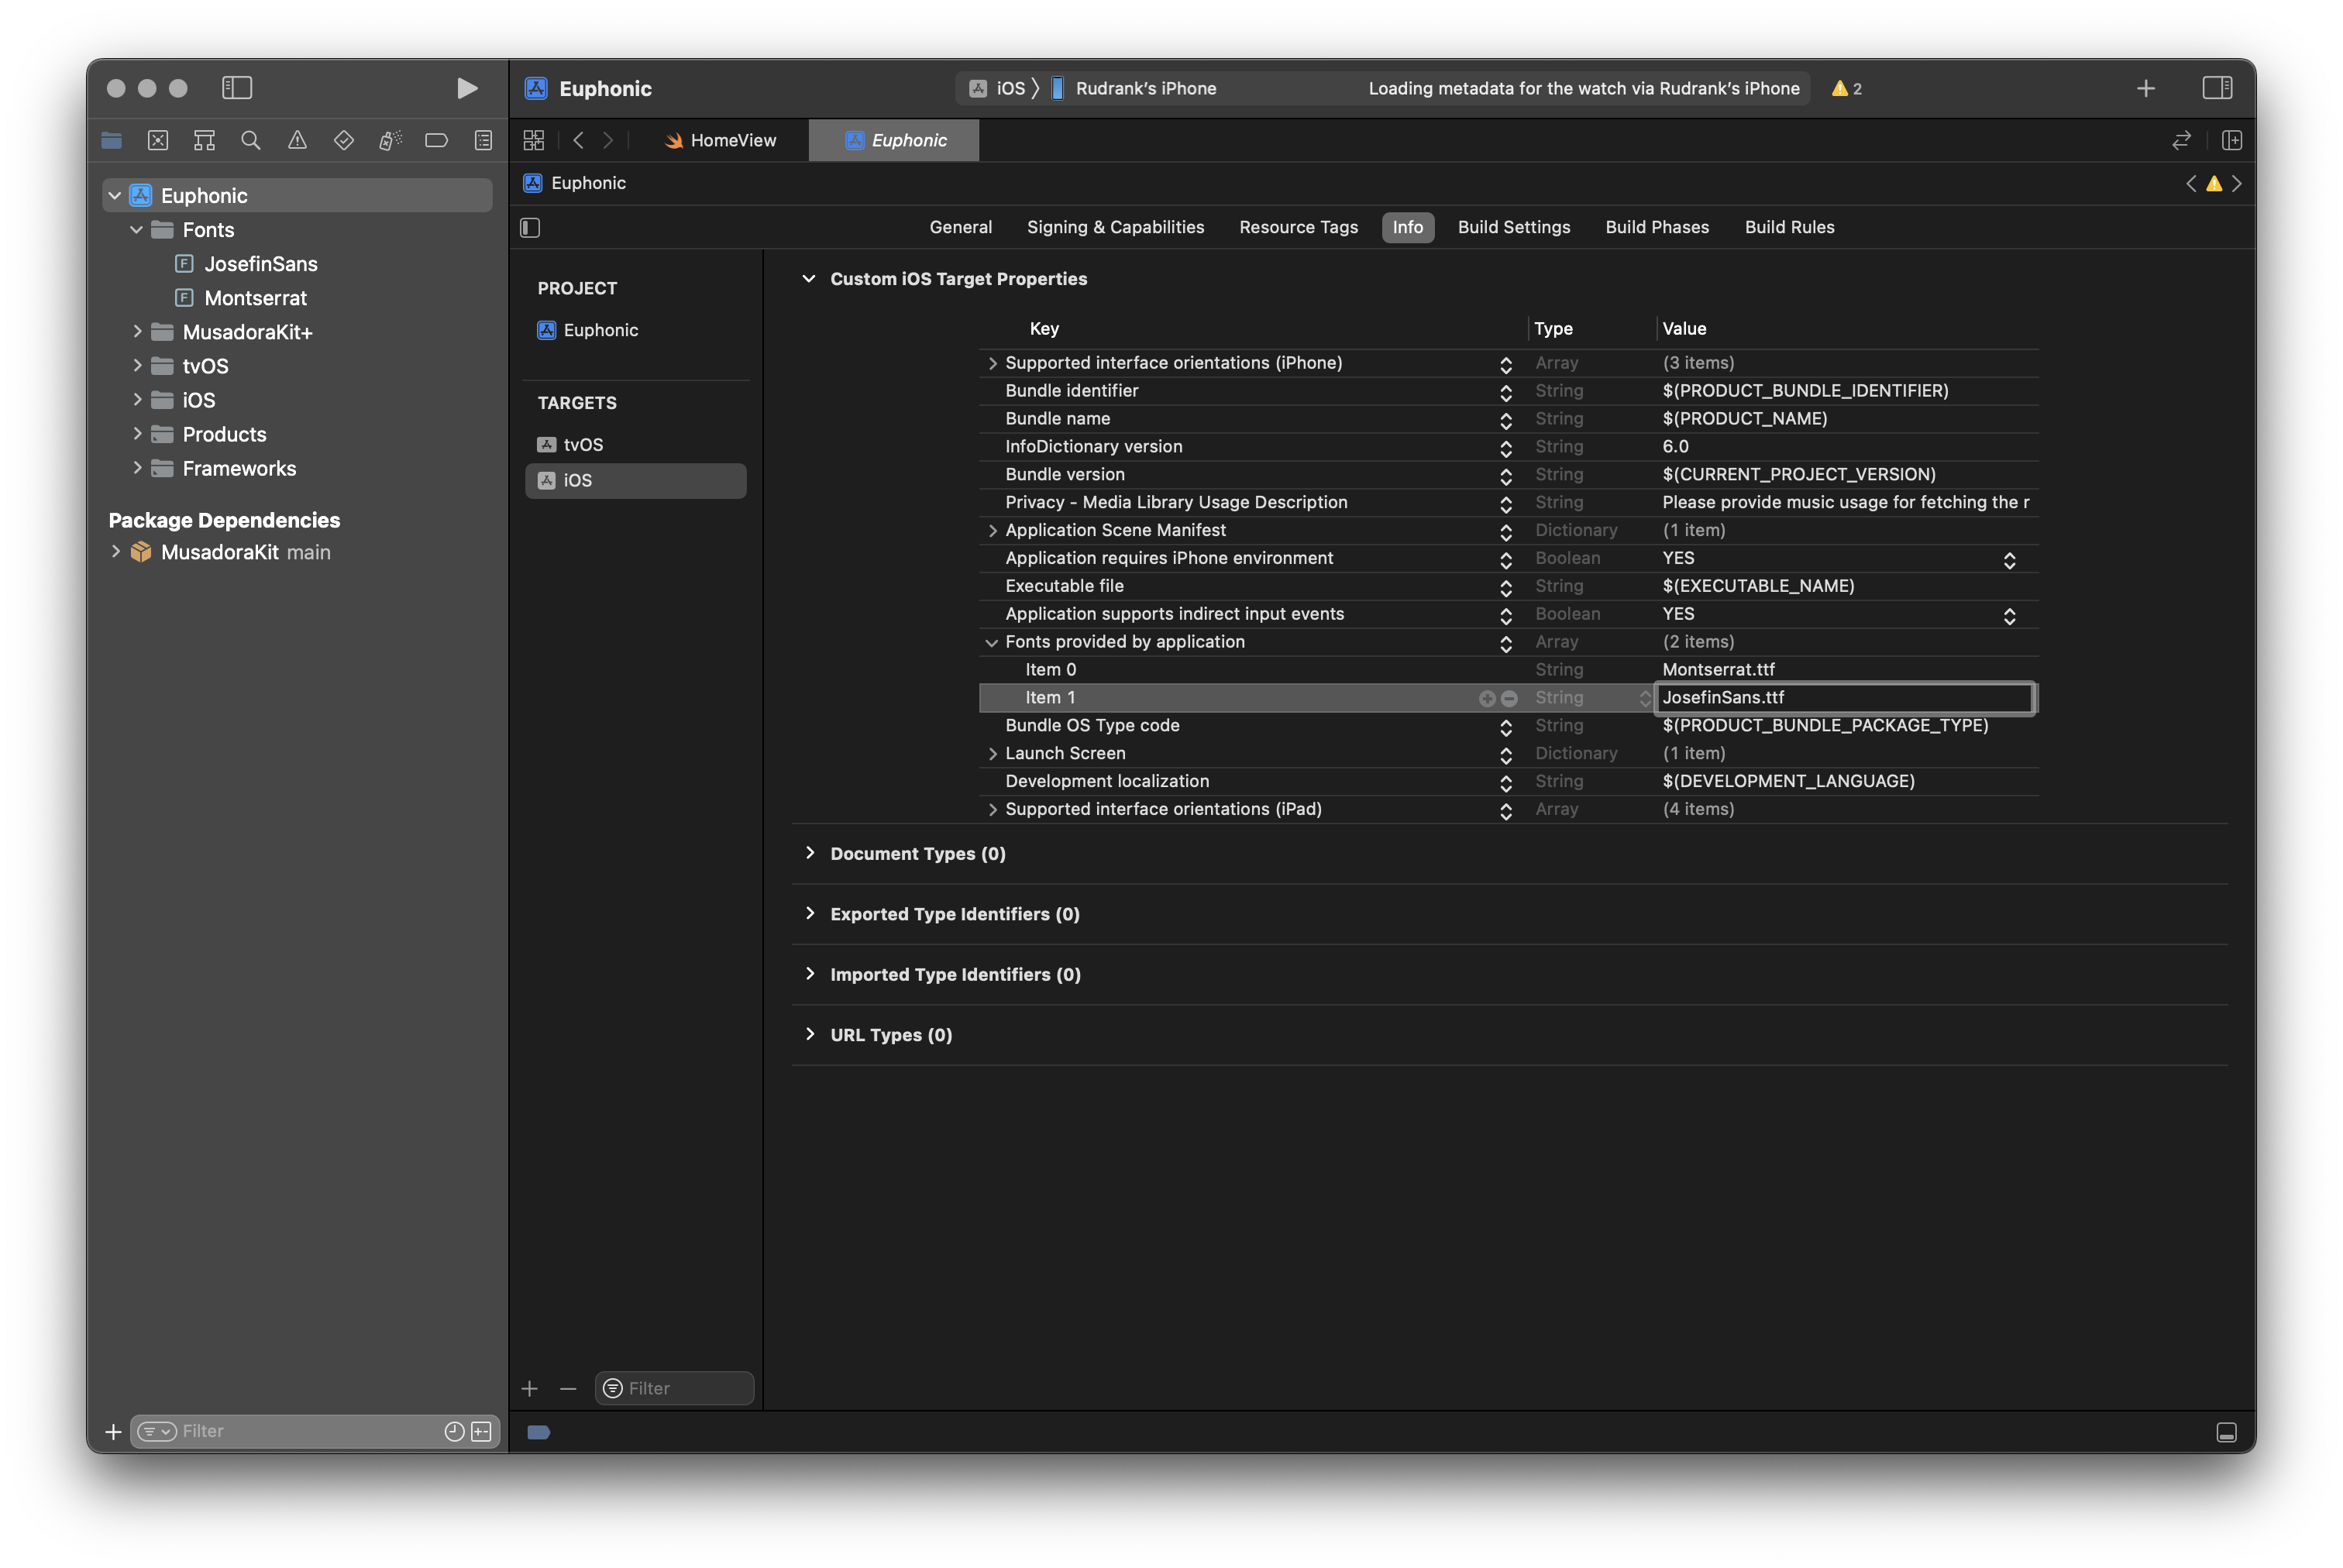
If you open the Info.plist as source code, this is what should be present in it:
<dict>
<key>UIAppFonts</key>
  <array>
    <string>Montserrat</string>
  </array>
</dict>
Finding the Names of Custom Font
If everything is set up correctly, you can now use custom fonts in your app. To understand the different types of font that you can use for the Montserrat family, add the following extension to your app:
extension View {
  func printFonts() -> some View {
    for familyName in UIFont.familyNames {
      print("\nFAMILY: \(familyName)")
      for fontName in UIFont.fontNames(forFamilyName: familyName) {
        print("-FONT: \(fontName)")
      }
    }

    return self
  }
}
Then, use it as a modifier inside the view’s body so you can remove it afterward. For Montserrat family, the response is as follows:
FAMILY: Montserrat
-FONT: MontserratRoman-Regular
-FONT: Montserrat-Thin
-FONT: MontserratRoman-ExtraLight
-FONT: MontserratRoman-Light
-FONT: MontserratRoman-Medium
-FONT: MontserratRoman-SemiBold
-FONT: MontserratRoman-Bold
-FONT: MontserratRoman-ExtraBold
-FONT: MontserratRoman-Black
Using Custom Fonts in SwiftUI
After knowing the font name you want to use, like MontserratRoman-Light, let’s use it in the SwiftUI view. Font provides an initializer that helps to work with custom fonts where you can provide the size and the text style for which you want to font to scale:
/// Create a custom font with the given `name` and `size` that scales
/// relative to the given `textStyle`.
@available(iOS 14.0, macOS 11.0, tvOS 14.0, watchOS 7.0, *)
public static func custom(_ name: String, size: CGFloat, relativeTo textStyle: Font.TextStyle) -> Font
Use it in the SwiftUI view as:
Text(viewModel.song.artistName)
  .font(.custom("MontserratRoman-Light", size: 17, relativeTo: .body))
Another example of using different text styles:
VStack(alignment: .leading, spacing: 2) {
  Text(song.title)
    .font(.custom("MontserratRoman-Bold", size: 17, relativeTo: .headline))

  Text(song.artistName)
    .font(.custom("MontserratRoman-Light", size: 15, relativeTo: .subheadline))
}
Custom Fonts and Accessibility
Although it is cool to use custom fonts, remember that they should be accessible. Secondly, you must make sure that you make the custom fonts support dynamic type, and your users can adjust the fonts accordingly in your app.
Fortunately for us, SwiftUI makes it a lot easier with specific customizations. As discussed above, you can make the custom font scale relative to a particular text style.
For example, if you make the custom font scale relative to callout, keeping the size as 16 points, then for xxxLarge size, it’ll be 22 points, and 25 points for AX1 accessibility size.
You can take help from the Specifications section under the Typography page of Human Interface Guidelines. It lists the different sizes.
Further Reading
For different custom fonts, you can create a typography system in your app to make it easier to manage different font styles and keep them consistent with the designs.
Here is an article for further reading: Exploring SwiftUI: Typography System.
Conclusion
Funky custom fonts look amazing on apps, but it is important to be a responsible iOS citizen by keeping accessibility in mind.
If this post helped you add custom fonts to your app, tag @rudrankriyam on Twitter to share your experience!
Exploring MusicKit and Apple Music API
Unlock the full power of MusicKit & Apple Music APIs in your apps with the best guide! Use code musickit-blog for a limited-time 35% discount!